FTP in Dreamweaver, for WPFolio installation.
We are going to be learning about ftp and will install some more files necessary for WPFolio.The folks who created WPFolio also have instructions, if you would like to check them out.
Create root folder on your computer
Create a folder on your computer. This will be the root folder for the local mirror of your online site. Name the folder whatever you wish. If you are on a Mac, I recommend creating this folder in the Sites folder, for the sake of consistency.
Setting up Remote/Local Sites and FTP on Dreamweaver:
NOTE: If you understand FTP and already have an FTP client you can skip this step and just download the required files (WPFolio, Gallery Plus, etc.) and drag and drop them in the appropriate folders. See below.
NOTE: For those students using BlueHost and who don’t have Dreamweaver, BlueHost suggests you use CyberDuck (Mac), CoreFTP (Windows), or Filezilla(Windows) as your FTP software. They are free.
Go to http://tutorials.bluehost.com/started/ and scroll down to “Managing /Uploading Files” and read their instructions for setting up these applications.
You can also use the free Firefox add-on FireFTP on all platforms as your FTP client.
Open Dreamweaver and choose Sites->New Sites from the top menu.

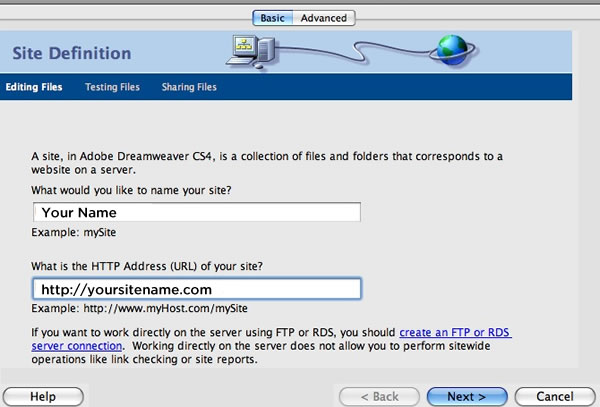
In the dialog box, choose the “Basic” option. Editing Files Step 1. Enter your site name and the url to your site. Click “Next”.
In Editing Files Step 2 choose the radio button that says “No, I don’t want to use server technology.” Click “Next”.
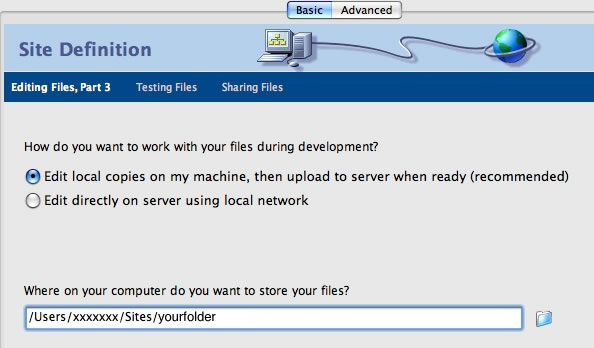
Editing Files Step 3, choose to Edit Local Copies. Click the folder on the right of the text box to find the folder you created at the beginning of the tutorial. It will look something like this on a Mac. The path will look different on a PC. Click “Next”.
Testing files. Use default. Don’t change. Click “Next”.
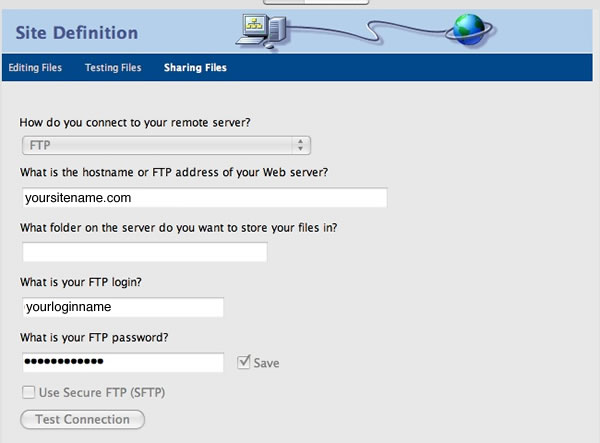
Sharing Files. Enter information for connecting to your site with FTP. If your site ends with .org or another extension use that instead of .com. Enter you username and password. These should be the username/password pair for your GoDaddy hosting account – not your database, wordpress or goDaddy account username and password. I know this is a bit confusing but… Click “Test Connection” to check you have entered the correct information. Troubleshoot if it does not work right away.
Sharing Files Part 2 – Choose “No, do not enable check in and check out.” Click “Next”.
Check the Summary, then click “Done”.
NOTE: Some hosts require “Passive FTP”. In Dreamweaver go to Sites->Manage Sites. Select your site, click “Edit”. In the dialog box choose “Advanced” and choose “Remote Info” from the drop-down list on the left. Then check “Passive FTP” and save and close dialog box.
Downloading remote files to mirrored local site.
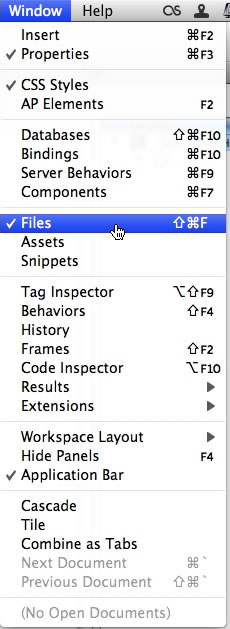
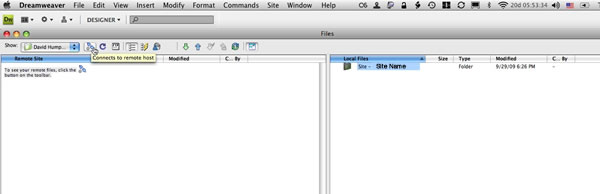
Open the file browser. Go to “Files” from the Windows menu:
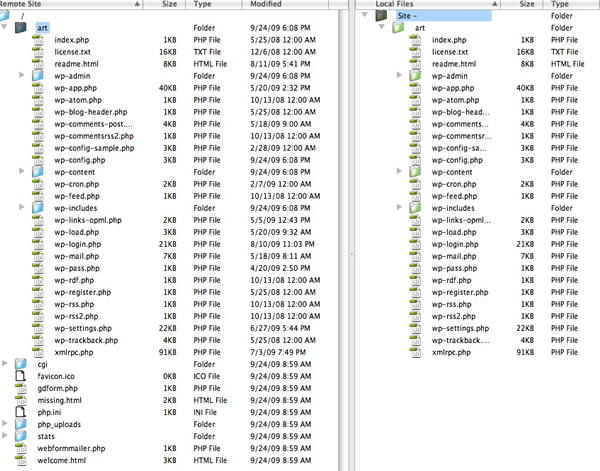
When the file browser is opened make sure that both the remote site and local site panels are open. It should look something like this:
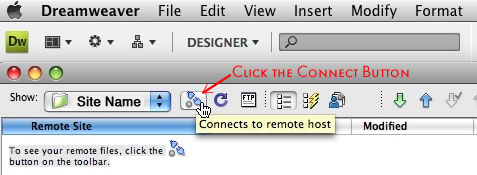
With the file browser open click the Connect button:
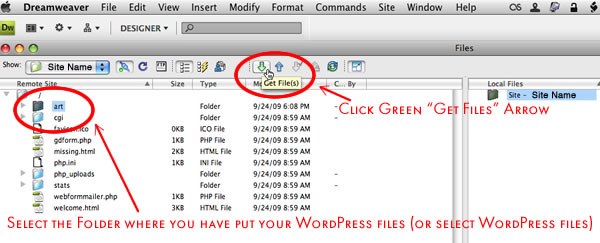
When the remote files appear select the your WordPress folder or if you have uploaded the WordPress files to the root folder, select the files. You don’t need to select the folders/files that come with the GoDaddy install, e.g “cgi-bin”, “php.ini”, “stats”, etc. Then click the green “Get Files” arrow to transfer the WordPress files to your computer.
To “get” files means that you send them from the remote site (hosted by GoDaddy, in this instance) to your own computer, better known as “downloading”. “Putting” files means to send them from your computer to the remote site, better known as “uploading”. These terms are good to know, you don’t want to confuse them.
To download your WordPress files will take at least 5 minutes. (more if you are on dial-up) Dreamweaver gives you feedback about the progress of the download.
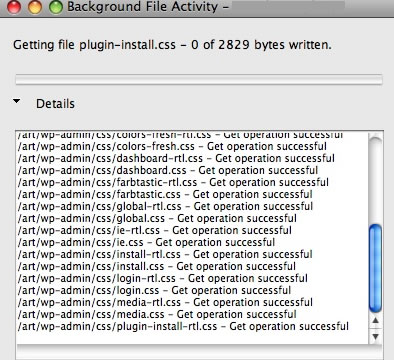
When the remote files are completely downloaded your file browser will look something like this:
Downloading WPFolio and required plugins.
Download the WPFolio template for WordPress.
Option 1:
The upcoming release of WPFolio (Version 1.5) has many new and useful features. I highly recommend that you download it. (It will be on WordPress.org soon)
For version 1.5 of WPFolio go to:
http://github.com/slambert/WPFolio
Click on “Download Source” button towards the upper right
corner.
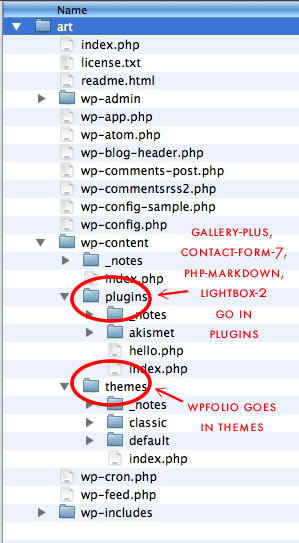
Save the wpfolio zip file in you local site folder in wp-content/themes, see below. Unzip the file. It will have a strange name like “slambert-WPFolio-v1.5-1-g2fc9aaa” . Change the name to “wpfolio”. Then follow the instructions for uploading it to your site below.
Option 2 (For version 1.41):
With the recent versions of WordPress you can add Themes from the WordPress Dashboard. Click on Appearances->Themes in the left-hand side panel of the WordPress Dashboard. Then click on the “Add New” button towards the top of the page. On the next screen enter “WPFolio” in the search box and click “Search”. Once WPFolio appears click “Install”, follow instructions and finally click “Activate”.
Option 3 (For Version 1.41):
Go to:
http://www.wordpress.org/extend/themes/wpfolio/ and click “Download”. Save the wpfolio zip file in you local site folder in wp-content/themes, see below. Unzip the file.
Option 1) Installing Plugins from the WordPress Dashboard:
With the recent versions of WordPress you can add Plugins from the WordPress Dashboard. Click on Plugins->Add New in the left-hand side panel of the WordPress Dashboard. On the next screen enter the name of the Plugin in the search box and click “Search”. The Plugins are listed below. Click the “Install” button for the appropriate Plugin, follow instructions and finally click “Activate”. Repeat for each Plugin.
Option 2) Downloading “manually”:
Download the following to the “plugins” folder in “wp-content”
Gallery Plus – http://wordpress.org/extend/plugins/gallery-plus/
Contact Form 7 – http://wordpress.org/extend/plugins/contact-form-7/
On the Eyebeam page of instructions that recommend Form something. I like and am familiar with Contact Form 7.
Lightbox 2 – http://wordpress.org/extend/plugins/lightbox-2-wordpress-plugin/
Optional:
PHP Markdown – http://michelf.com/projects/php-markdown/
The Eyebeam site recommends using PHP Markdown. I am not going to cover it. If it looks promising to you download and install it.
If they are zip files, unzip them.
Uploading WPFolio
Back to Dreamweaver.
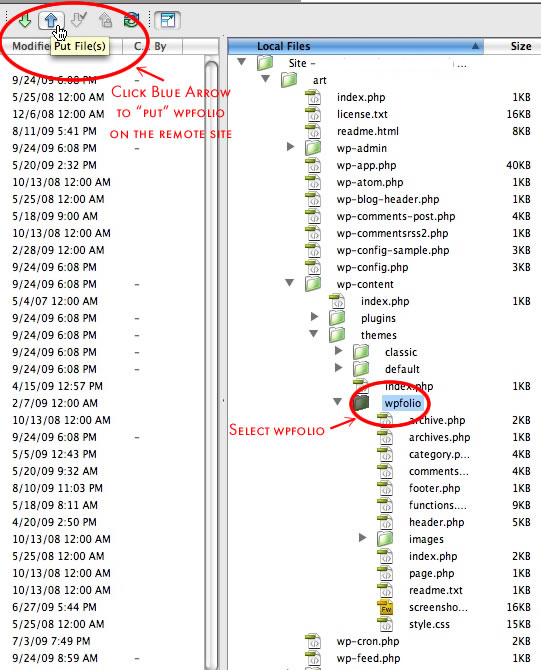
In the file browser, select “wpfolio” in “wp-content/themes” and click the blue arrow to “put” or upload “wpfolio” to the remote site.
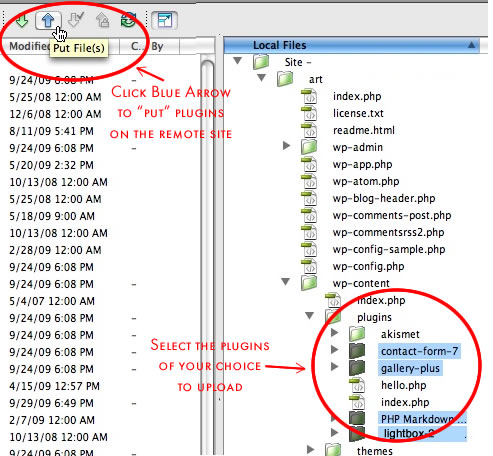
Select “contact-form-7”, “lightbox-2”, “php-markup” and “gallery-plus” in “wp-content/plugins” and click the blue arrow to “put” or upload them to the remote site.
Ok. Now everything is downloaded. It is time to go to wordpress and configure WPFolio and the plugins.
Hello Daniel,
I do not have dreamweaver, and was hoping you could point me in the direction of the best (in your opinion) free FTP software. I have tried a few, but have been unable to find one compatible with my version of Tiger os x 10.4.11?
thanks!
sam
Sam,
I don’t use Dreamweaver much myself. The original tutorial is for a group of students who have access to Dreamweaver through their school. I now use Transmit from Panic, which costs $29.95 and have used Fetch – $29.00. Both of them are very good and reliable. Having not used other products, I cannot recommend them. To find a freeware FTP client, I would suggest using Version Tracker. Unfortunately in “computer years” 10.4 is very old and is not being supported by developers so much. Hope you find a good solution. Write when you do.
On PC’s there is SmartFTP, Filezilla, or WS_FTP
Daniel