CREATING A LOCAL WEBSITE ON MAC OS 10.5
Easy to follow, with lots of pictures.
For each of my websites, I create a website on my own computer that exactly mirrors the online version. This is a tutorial that shows you how to set up your computer so it works like a webserver. I make all changes on the local website and test them before they are uploaded to remote websites. There are a few other tutorials that will tell you how to create virtual hosts on your Mac, but this is meant for people with little experience who need step-by-step instructions. I hope it is helpful.
NOTE: You can also do this through the command line, using the Terminal, but you probably don’t want to learn Unix right now.
You can also download MAMP, a program that sets up Apache, MySQL, PHP, VirtualHosts, etc. for you and will do much of the work for you. I find doing it "by hand" is easier, though.
What you need to start
You will need to know your short username, usually the name of your "home" folder
You will need to know the password for your user account on your computer.
You created this password when you first set up your computer or installed OS 10.5.
You need a plain text editor. Here are a few popular choices:
- BBedit, a full featured text editor or Textwrangler, the "lite" version are available from Barebones Software
- Textmate
- Coda, also includes ftp, css editor, terminal and many other useful features.
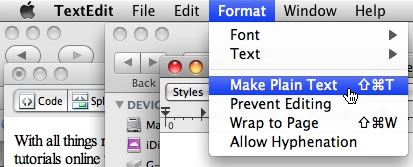
I do not recommend using the TextEdit application, included with all Macs. If you do useTextEdit, you must tell it to use "plain text" only.
It will be much easier to navigate and save documents if you use one of the several good text editors that are available.
Creating a folder for your local website.
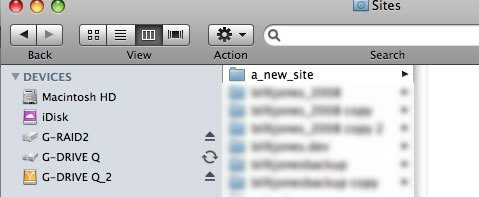
Create a folder on your hard drive where your local site will reside. You can put this folder anywhere but I like to stick with the standard OS 10 folders so I put all my local sites in the Sites folder. As an example I have created a folder called "a_new_site". Note that the folder name has no spaces and is all lowercase. Unix, the operating system "underneath" OS 10, is case sensitive and white spaces are considered characters. Your life will be much easier if you develop the habit of naming all website-related files and folders without capitals or white spaces.
Editing the "hosts" file
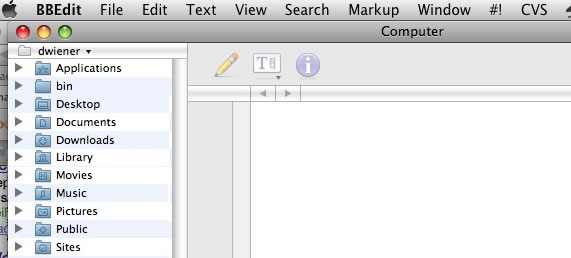
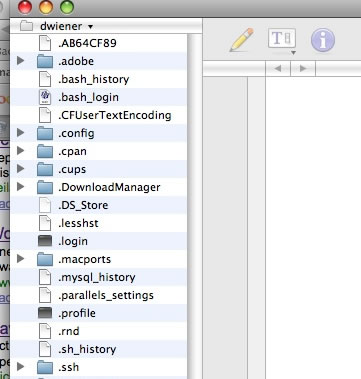
Open up a disk browser in BBedit, File->New->Disk Browser. It will look something like this:
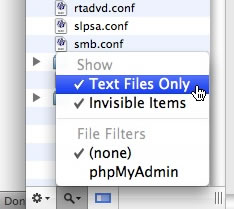
Now, you will need to navigate to some of the system folders that are usually hidden from view, so you need to tell BBedit to show them to you. Click on the magnifying glass at the bottom left of the Disk Browser and select "Invisible Items".
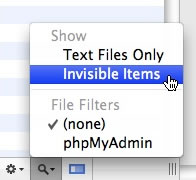
After selecting "Invisible Items" your Disk Browser should look something like this:
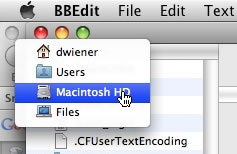
In BBedit’s Disk Browser, navigate to your hard drive.
And then navigate to the folder named "private", then to "etc". You are looking for a file called "hosts". If you don’t see it make sure that "Text Files" is unchecked.
Open "hosts" by double-clicking it.
When you try to edit this document you will see the dialog box below:
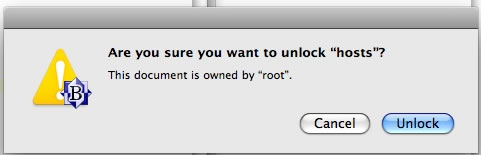
Click "Unlock".
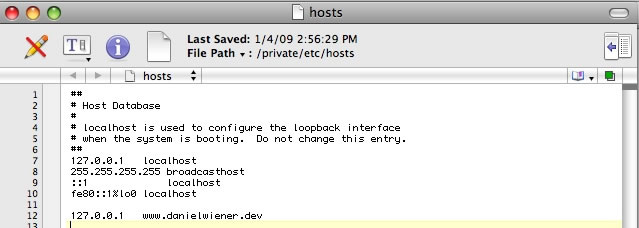
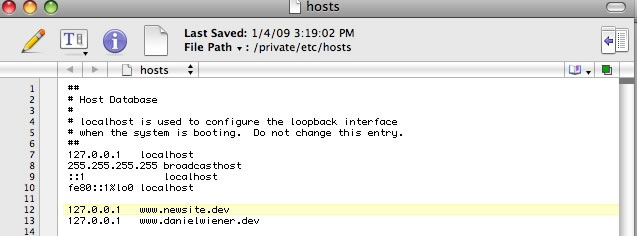
You can now edit the "hosts" document. On a separate line write:
127.0.0.1
then hit "tab" on the keyboard and write the name you wish for the local site. In this example I call it www.newsite.dev (You can call it anything but I usually give the same name as the online site with the .dev ending. It makes it easy to remember).
Next you need to save the file but you will be need to be authenticated as someone who is allowed to change system files and so will be asked for your username and password.
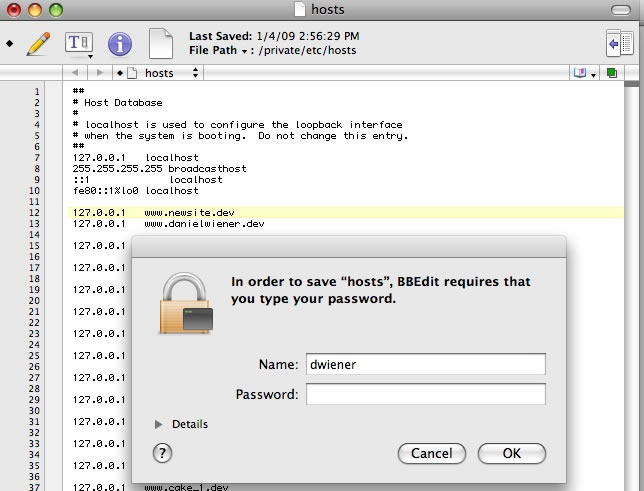
Enter password and click "OK". Close the "hosts" file. You are done with it.
Editing the "httpd.conf" file
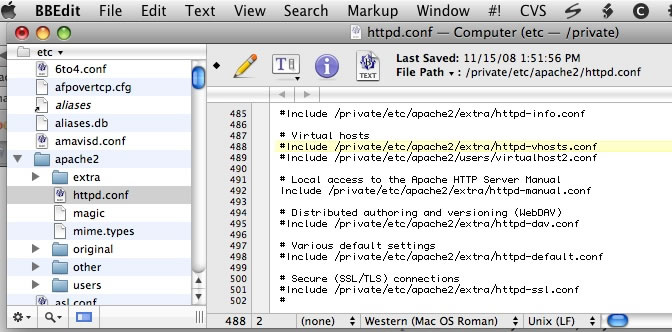
Now navigate to a folder called "Apache2". It is in the "etc" folder. Open the file named "httpd.conf". (You may want to save a copy with the default configuration, in case something goes wrong.) Find the line that says "#Include /private/etc/apache2/extra/httpd-vhosts.conf". It will be somewhere between line 450 and line 500. Remove the hash (#) sign to uncomment this line. You will have to unlock this file and enter your username and password to save it, just as you did with the "hosts" file. See images below.
Before
After

Editing the "httpd-vhosts.conf" file
Next open the folder "extra" and open the file "httpd-vhosts.conf". At the top of page there is an example (that is commented out) of the format for defining a virtual host. Farther down the page copy this format but with your own username, file paths and server name. Using the example, I have created, "a_new_site", the virtual host definition would look something like this:
<VirtualHost *:80>

                  DocumentRoot "/Users/dwiener/Sites/a_new_site"

                  ServerName www.newsite.dev

                  ScriptAlias /cgi-bin/ "/Users/dwiener/Sites/a_new_site/cgi-bin/"

                  ErrorLog "/private/var/log/apache2/newsite.dev-error_log"

                  php_value include_path ".:/Users/dwiener/Sites/a_new_site/cgi-bin/"

  </VirtualHost>
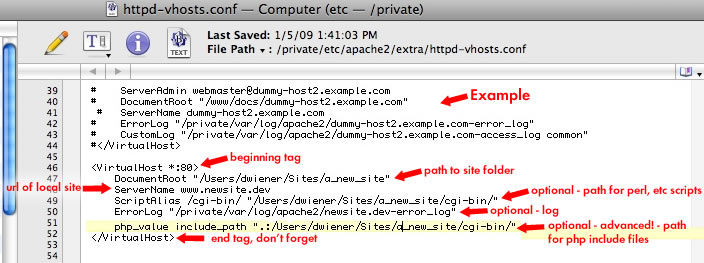
The only definitions that are required are "DocumentRoot" and "ServerName". Many other definitions are possible but these will get you up and running. The ScriptAlias, Log paths and php include path are common definitions and are included because they may help you in the long run. As you type this out, be very careful with quotes, white space and returns , they usually matter. Be sure to replace my username, "dwiener" with your username. Save this file. You will have entered your username and password to save it.
Creating the user file
Next, create a new file and add the following text:
<Directory "/Users/dwiener/Sites/*/">
Options Includes Indexes Multiviews
AllowOverride All
Order allow,deny
Allow from all
</Directory>
Be sure to replace my username "dwiener" with your username. If you have placed your local website in another folder than "Sites" make sure you have the correct path. The "*" means that all folders in the Sites folder will be configured correctly.
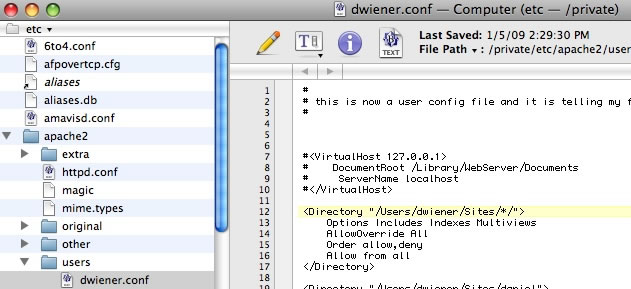
Then save this file in the "users" folder in the "apache2" folder, naming it with your username and the extension ".conf", as shown above.
Restart Apache, your Web Server
Last but not least, you need to restart your Mac’s webserver.
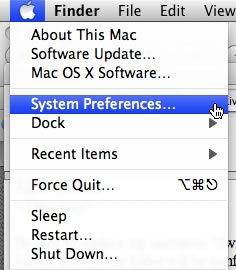
Open the System Preferences:
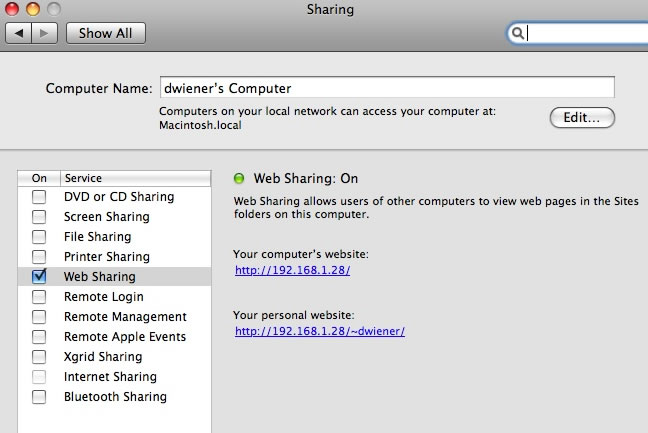
Choose the "Sharing" Preference
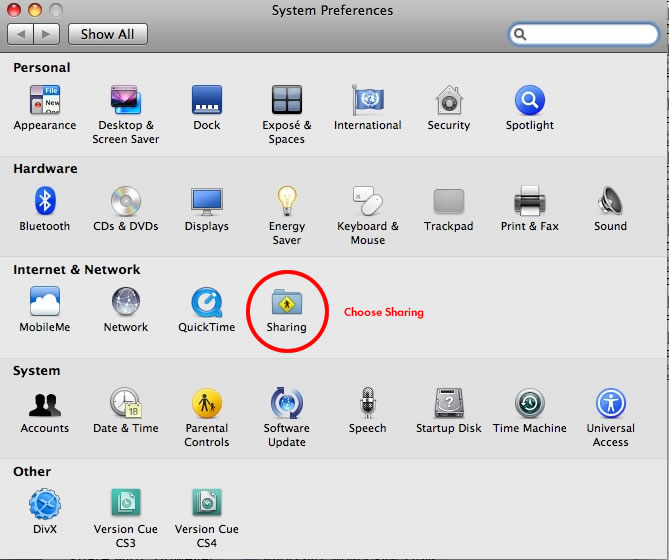
Turn off "Web Sharing" by unchecking its checkbox.
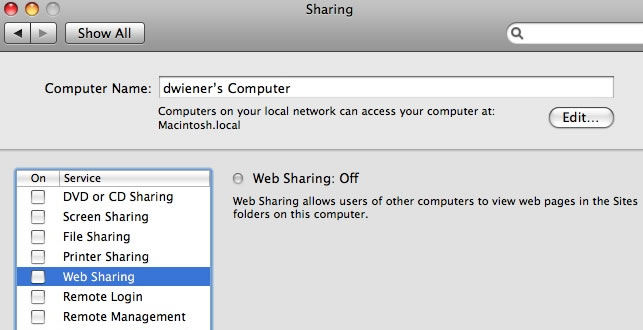
Turn "Web Sharing" back on by checking its checkbox.
Making an index file and testing the site.
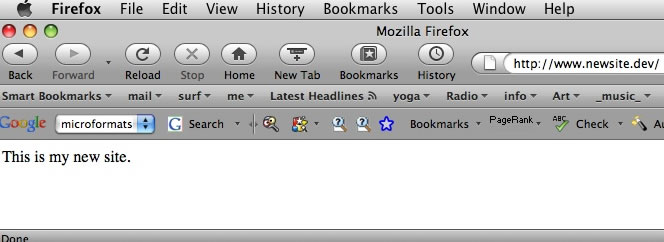
Before you test this in your browser, let’s make an index file for "a_new_site"
Create a new text file, write something like:
<p>This is my new site.</p>
Call it "index.html" and save it in the folder you created at the beginning of this tutorial – "a_new_site", in this example.
Then open your browser, point it to "www.newsite.dev" (or the server name you have chosen) and you should see:
Be Patient
Be patient with yourself. It probably won’t work the first time you test it. Go back over the files and check for misspellings and incorrect punctuation. When you are troubleshooting be careful to only change one thing at a time. If you change too many things at the same time you won’t know which modification is correct and which one is causing the problem. Also make sure that you restart the web server each time after you have changed one of the system files – "hosts", "httpd.conf", etc.
One more thing
Note: Verizon and some other ISP’s redirect your browser to an advertising landing page that they host, if you type an incorrect url in the browser. Since the url of your local server is only known and used by you, you may see the Verizon error page. This is very frustrating and intrusive. You can opt out of this service by clicking the link below.
Opt out
Or you can add 68.238.0.14 to System Preferences > Network > TCP/IP > DNS settings. This may vary from region to region. You may have to search Google to find a solution.
Good Luck
Good luck with virtual hosts. I hope I was of some help. Leave a comment
You are the coolest person ever!!! I’ve been learning Linux server administration at work, so all of this looks way familiar. I knew that Mac was based on *nix, but was not at all aware how to get to the pieces except through the Terminal. I like this *lots* better. You deserve an award – you have made my life a ton easier. Thanks a whole lot for sharing!!
I followed this tutorial. THANK YOU! However I can not get it running. I have a 2wire router with AT&T DSL wireless do I need to configure something with the router preferences? What else is for me to check? Do I need to install apache or change my website name or .dev termination. I am lost! Thank you for your help.
The tutorial is for creating a local version of a website, using the webserver included on every Mac. This means that it ONLY exists on your computer and you will be the only one to see it. It will not be seen by anyone on the internet. So your router and DSL have nothing to do with this. A local versions of a website is for testing, development and updating. Usually I will make changes or figure stuff out on the local version and once I am sure it works I will upload the revised files to the remote website (the real website, the .com or whatever) via FTP. I hope this is clear.
Also Apache is included on the Mac operating system. If you have followed the instructions you have been altering the configuration of Apache. Since I cannot see any of your modifications I am not sure what the problem is. Editing text files can be very touchy, so I would suggest going through all the instructions one by one and checking them against your revisions. Sometimes a misspelling or a missing line return (or something else equally trivial) will be the cause of the problem. And be sure to turn off and then turn on Web Sharing in your System Preferences (this restarts Apache) each time you make a change.
Daniel
I was wondering if you had any info on creating a virtual host out of the Sites folder on a local copy of an iDisk instead of the Sites folder in the User folder. I can’t seem to get it to work with this tutorial. This would be extremely convenient to be able to sync my dev sites between my computers using iDisk. Any help would be appreciated. Thanks!
Braden,
I am sorry I do not know how to do that. And my guess is that it is not possible. iDisk is a way to store data. You need a full fledged computer running the Apache webserver software to create a Virtual Host. Write if you find a way to do what you want.
Braden,
Great article thank you and very easy to follow.
I have not used virtual hosts before and have a fundamental question; what are the benefits of using them?
I develop numerous sites and keep them in separate folders in my Sites folder as in [myUsername]/Sites/my_dev_site/. I can then access them locally in a browser as localhost/~[myUsername]/my_dev_site/
Generally I develop the site at this location and then FTP the files to a staging or sometimes live server as required.
Am I missing something by just using the Sites folder instead of setting up virtual hosts?
Your way of setting up a dev site works for some instances. When you create a virtual host then you create a working server for each site you are developing. You can then use absolute paths, .htacess files, etc. I use WordPress most of all and it will not work unless you create a host for each site. And I also use Perl in a folder outside of the web root folder which will also not work without creating a host. I hope this answers your question.
Yes Daniel that answers my question perfectly!
I’m going to start using Virtual Hosts now all the time.
Thank you.
I am trying to set this up for 2 websites I have in my Sites folder. In the hosts and httpd-vhosts files the 2 sites are set up almost exactly the same, except for the ServerName and DocumentRoot. The problem I am having is that only one dev site works, and the other dev site gives me 403 Forbidden error saying I don’t have access to /index.html. Is there something different I need to do for hosting multiples sites?