After using GoDaddy for students’ website workshops I decided to use BlueHost because it is much easier to use, though slightly more expensive than GoDaddy. With both, many technical issues are avoided.
Alternatives Hosting Services
Below are some alternatives to BlueHost along with links to tutorials for installing WordPress. I have never used them and cannot help students and others troubleshoot the set-up process.
HostIcan
One-Click Self-Installation of WordPress with HostICan
Media Temple
1-Click Self-Installation of WordPress with Media Temple
One-Click Self-Installation of WordPress with DreamHost
Purchasing a Domain Name and a Web Site Hosting Plan:
Before you start you should choose your desired domain name, plus some alternatives if you your first choice is not available. And you should have your credit card and a way to copy and keep the usernames and passwords that you will be creating.
You should have:
- desired domain name
- alternate domain names
- credit card
- a notepad, document or program for safely storing and organizing usernames and passwords
- patience
NOTE: If you already own a domain name, BlueHost can help you transfer your domain name to them.
NOTE: If you are planning on using a paid portfolio service like CarbonnMade or Arlo only purchase the domain name. If you buy both domain name and hosting plan together there is a discount for the purchase of the domain name. My total cost for both was $17.14.
Sign Up:
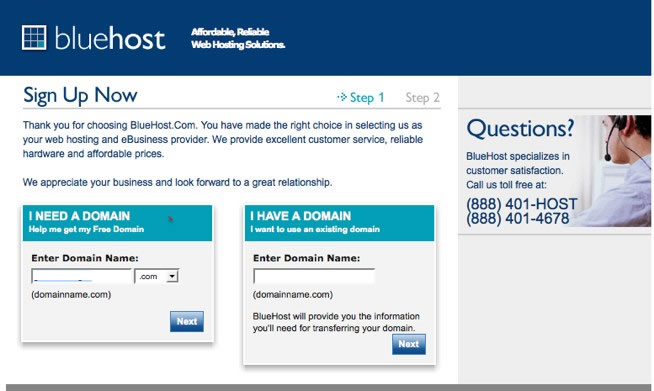
Go to BlueHost, click “Sign Up Now”.
Fill in you desired domain name in the textbox on the left. Click “Next” to continue.
If you already have a domain name, fill in the textbox on the right.
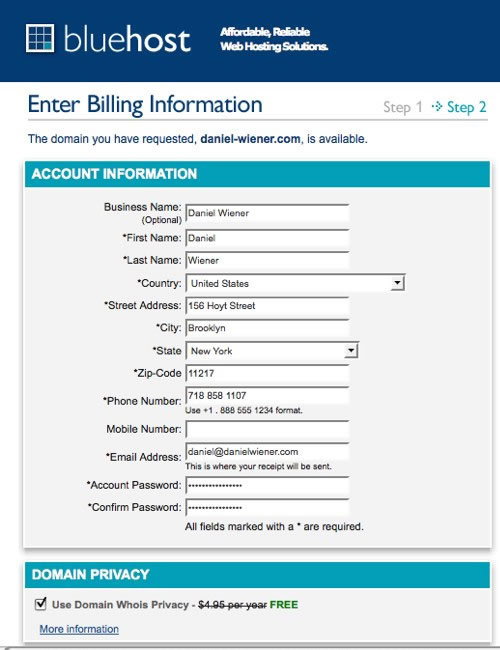
Enter Billing and Account Information
Fill in your account information. Choose a password. The password must be 15 characters or less. To create a secure password use a combination of uppercase and lowercase letters, numbers and characters like $,&,*,-, etc. Make sure that you write down your password and save it in a safe place you will remember. This is the password for you BlueHost account and will also be used to FTP files to your server.
Choose you account plan and fill in your credit card info or choose to pay with PayPal.
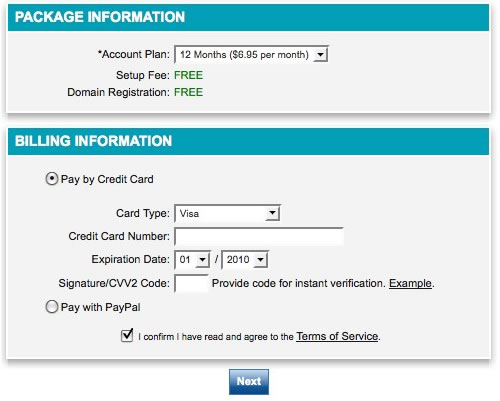
Click “Next” towards the bottom of the screen.
Congratulations
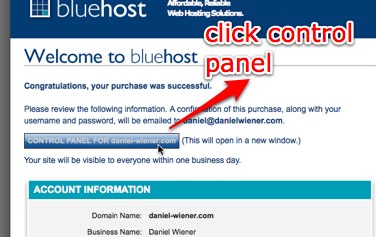
This next screen echos your bill information and the purchase process is complete.
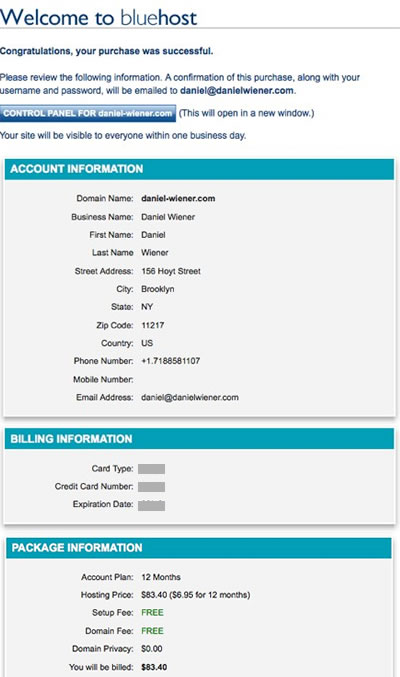
You will receive 2 emails confirming the purchase of your domain name and hosting account. One email will include your username and password for BlueHost account. Please save it in a safe place you will not forget. The username and password will also be used for FTP.
Once you have checked the accuracy of the information click the “Control Panel” button.
Control Panel – Help and Tutorials (optional)
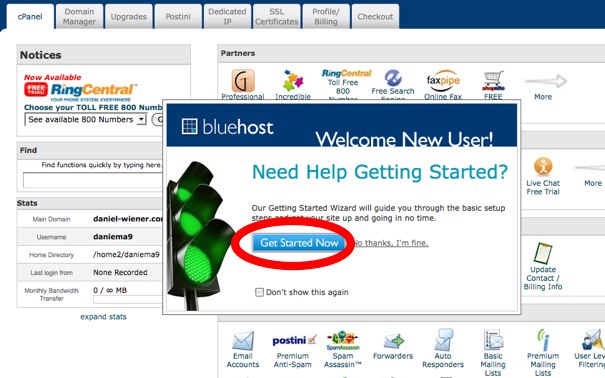
On the next screen, close the pop-windows trying to sell you stuff.
If you want to learn more about using BlueHost, you could spend some time now reading over some of their tutorials or you can skip onto the next section. To read BlueHost’s tutorials click “Get Started Now”
On http://tutorials.bluehost.com/started/ BlueHost lists its help links. Of particular interest for us are:
Simple Scripts
http://tutorials.bluehost.com/started/ss.htm
WordPress Installation and Configuration
http://tutorials.bluehost.com/started/WP_install.htm
http://tutorials.bluehost.com/started/WP_use.htm
http://tutorials.bluehost.com/started/WP_themes.htm
http://tutorials.bluehost.com/started/WP_plugins.htm
You can also find the tutorials in the cPanel by clicking on the these buttons:

Finding your FTP username and password on Bluehost (optional)
Go to Bluehost.com
click Control Panel

To enter the cPanel at BlueHost
–enter your domain name e.g. daniel-wiener.com
–enter your password – you have received an email with the password from bluehost.
In cPanel->Files click on FTP Accounts

Next Screen scroll down to Account Management and click on “Configure FTP Client”
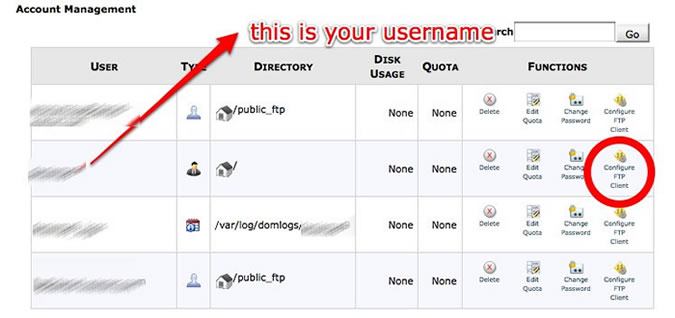
ON the FTP Accounts screen -there are manual settings at the lower left. These are what you need to enter in your ftp client.
OR
Click on FTP configuration link for your chosen ftp client – CyberDuck, CoreFTP or FileZilla and follow the instructions.
A few FTP client suggestions(optional)
MAC
Fetch – http://fetchsoftworks.com/ Trial for 15 days – $24.00
Transmit – http://www.panic.com/transmit/ – $34.00
Cyberduck – http://cyberduck.ch/ – Free
WINDOWS
CoreFTP (Windows) – Free
Filezilla(Windows) – Free
There are others. Too.
Setting up Cyberduck as an FTP client if using Bluehost (optional)
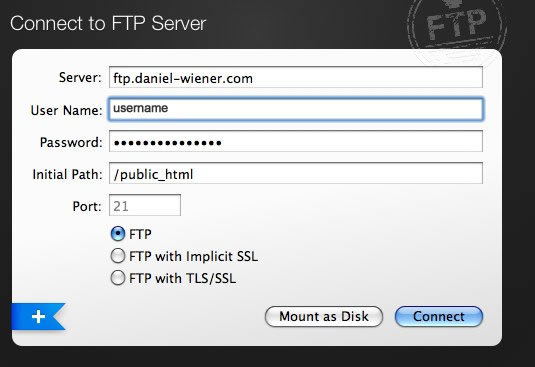
After downloading Cyberduck, start the application.
Click: “Open Connection”
Server: ftp.domainname.com
username: username@domainname.com
password: your_password
click “Add to Keychain”
path: /public_html
click “connect”
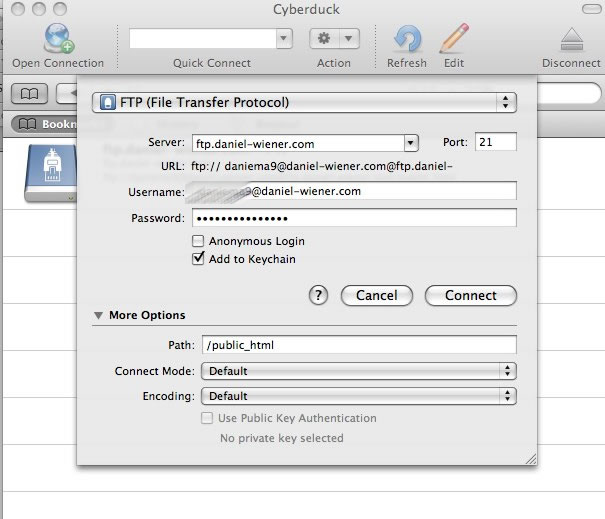
NOTE: some ftp clients are set up differently. Be sure to read the instructions for your particular ftp client.
FTP programs are essentially file browsers, like the Finder on Macs and Windows on PC’s. They work in a similar way to the Finder and to the Windows Browser where you can move files and folders by dragging and dropping, etc. but instead of moving things around on your own computer you are moving them from one computer to another.
You are done purchasing your domain name and hosting account.
The next step is to install WordPress.