Openness, transparency and the sharing of knowledge is the ethos of much of the internet and social media. In that spirit, I am trying my hand at “open source” sculpture and write histories of my sculptures. Perhaps you will find it useful.
Algorithm for a “Crazy” Vase
December 2008 – April 2009
Desire
I want to make an “animated vessel”.
I piece some plasticine sketches that have been laying around the studio for years to begin modeling its shape.
Its form is loosely based on a face.
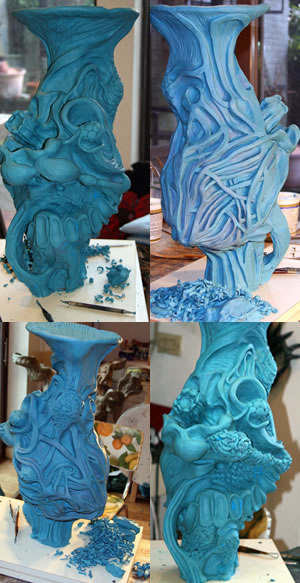
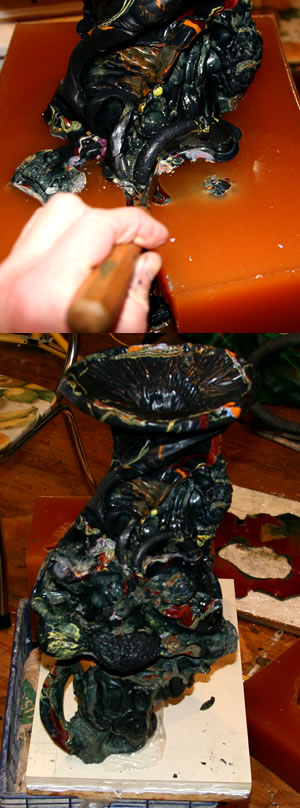
Making the Model out of Plasticine
To the left are four views and a few states of the “crazy” vase in plasticine, an oil-based modeling clay. Plasticine does not dry and is used to make “positives” for casts.
The final state can be seen in the lower right hand corner of the photos to the left
Notice What Happens
Sometimes things happen and I want to save them for some other use. I save the scraps from “carving” the plasticine and use them in this piece and others to create a surface texture.
The top of the “crazy” vase catches my attention and I want to make a piece based on the way it looks.
January 16, 2009
Making a Box to Hold the Mold
Measuring, cutting, fitting. clamping, screwing a box together to hold the liquid mold rubber, while it dries. Being very careful it will not leak, there are double bonds over every seam and caulk on every seam or gap, as well. It’s worth the trouble.
January 25, 2009 – February 5, 2009
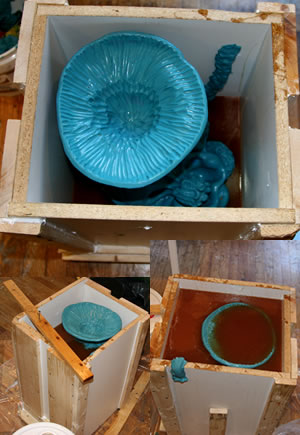
Pouring Rubber for Mold
The box has been made. Note the overlapping boards at the corners and the caulk.
I pour the rubber in sections, 8 – 15 inches high, so that I will be able to reach in and press the Apoxie-Sculpt into the mold when I am making the vase. I like to make sure the rubber cures for about 8 hours between pours so that it does not stick to itself. I spray the plasticine positive and the cured rubber with mold release so the rubber won’t stick to them. I usually spray twice, because I am compulsive and don’t like spending hours fixing mistakes. I use Polytek 74-30 for the rubber mold. It is of medium hardness – flexible enough to separate from the complex shape with many undercuts and firm enough for the pressure when creating the “cast”.
I also make “keys” out of plasticine so the sections fit together nicely (see top right corner of the upper photograph.)
I did not take photos of the preparation of the Polytek 74-30. But my advice is to stir thoroughly (2 minutes) and cover your work area with plastic. It is messy and sticky. Be careful not to contaminate Part A with Part B (and visa versa) by keeping your tools, buckets, lids, etc. separate from each other.
February 8, 2009
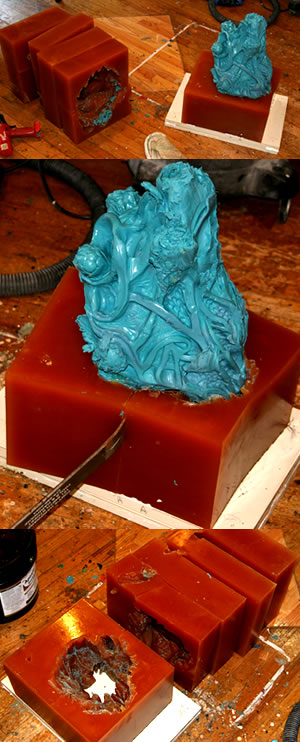
Removing the Rubber from Plasticine Positive
With a sharp utility knife I slice the rubber through to the plasticine. Sometimes one slice is enough, other times I need to cut the segment into many parts to pull it off the plasticine. The bottom segment is particularly stubborn so I use a crow bar to pry it apart.
Usually the plasticine gets mangles during this process. Before I start to make a “cast” I spend time cleaning the plasticine off the inner surfaces of the rubber using clay tools.
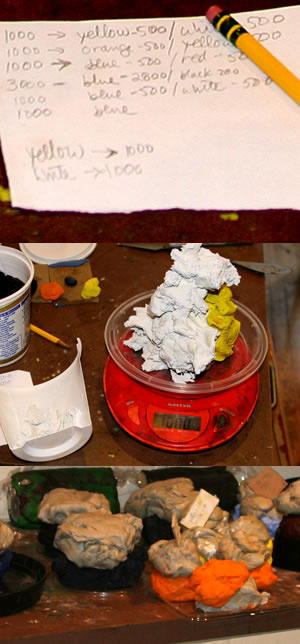
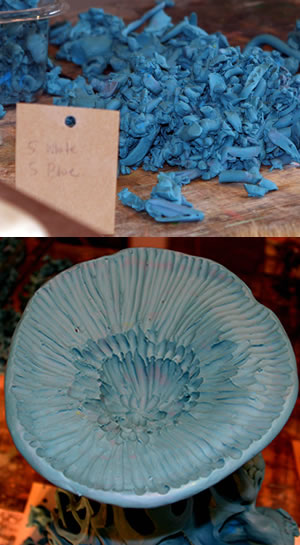
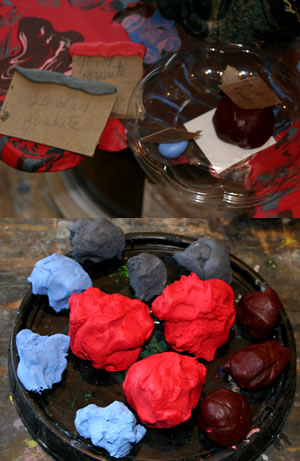
Preparing the Apoxie Sculpt and Choosing Colors
I guesstimate how much Apoxie Sculpt I will need. I decide on 16,000 grams total, which means I need 8,000 grams of Part A. I want to use 6 colors with dark blue as the outer layer. Using my homemade color swatches and mixing up a few colors I decide on the following. The decision is intuitive because I know the colors will mix in this process in ways I cannot predict. Only so much planning is effective – the rest is left to luck and chance.
I decide to use the following colors:
Light Yellow – 1000g
500g yellow + 500g white
Yellow Orange – 1000g
500g yellow + 500g orange
Purple – 1000g
500g blue + 500g red
Dark Blue – 3000g
2800g blue + 200g black
Light Blue – 1000g
500g blue + 500g white
Blue (right from the tub) – 1000g
Photos to the left – figuring, weighing, piles of Part A and Part B prepared and ready to be mixed. I have separated them into 3 batches. If I mix too much at a time it will harden while I am working with it.
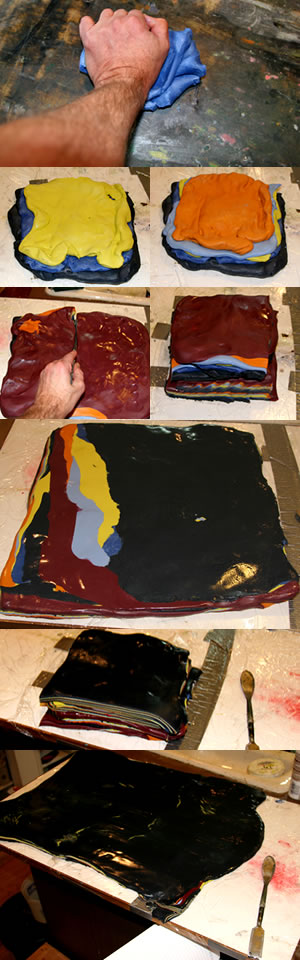
Mixing the Apoxie Sculpt
I mix the Part A and Part B of the Apoxie-Sculpt on a wooden table, sponging the table often with a damp sponge. The table should be slightly wet but you should not be able to see the water. Too much water creates slop and if there is not enough the Apoxie-Sculpt will stick to the table. I mix it the same way that you wedge clay.
Making a Slab of Layered Color
The colors are laid out in approximately 12″ square slabs, one on top of the other. In the following order:
Purple
Yellow Orange
Light Blue
Light Yellow
Blue
Dark Blue
Flatten out the stack of colors to approximately 1″ high. Cut into quarters. Stack each piece making sure the color layers are in the same order. Flatten out again to to approximately 1″ high. Repeat this twice.
The only reason that care is needed is so each segment of the mold matches. When the piece is cast I don’t want the segmentation to be too obvious. I make a mistake with this piece repeating this process 3 times for the first batch of colors (making the layers very thin) and only repeated it twice for the next two batches. It is interesting to see how the colors combine in different ways given how many times they were layered and flattened. Since my method is experimental I only notice the difference once I do it.
Flatten out the slab of colors to 18″ across and 30″ long, using a rolling pin, and the heal of the hand. Use mineral oil as a lubricant, but not too much.
In the process of flattening, the slab is flipped several times. Now dark blue is on the top. Dark blue will be on the outside of the sculpture and so will be laid against the surface of the mold.
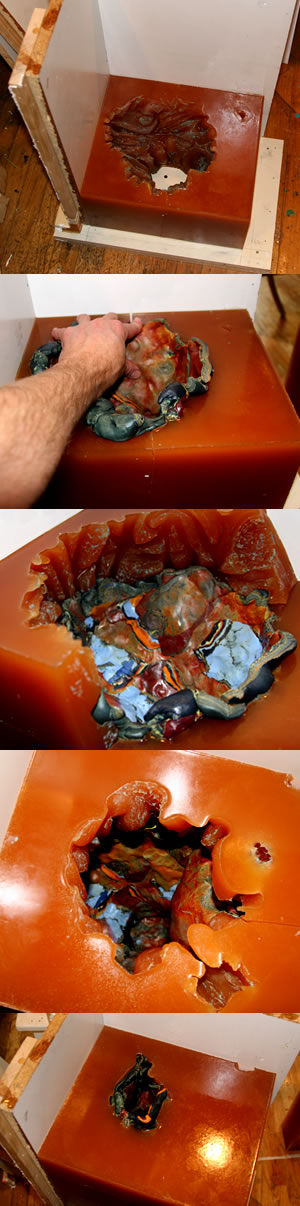
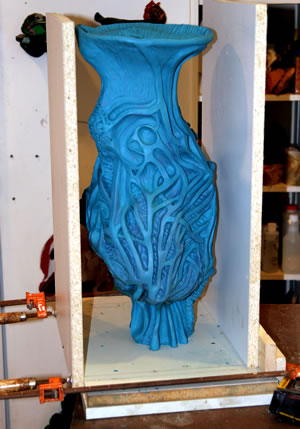
Pressing the Cast
Reattach 2 walls of the original box built for the mold to use as a guide for the mold segments.
Press small portions of the Apoxie Sculpt slab into all the nooks and crannies of the mold. Press over and over and over, to make sure there is a good impression.
The outside of the vase is hidden from view so I work blind and only by feel. The inside of the vase looks promising but I have no idea what is happening to the outside.
I like processes like this – lots of method and control but an equal lack of control. I like to see what happens when the two systems battle it out. I also like the idea of making sculpture, a tactile art, literally “by feel”.
Mixing the Apoxie Sculpt and pressing it into the mold takes 4 – 6 hours without a break. If the Apoxie-Sculpt dries between batches it might not mix together “beautifully”.
February 10, 2009
Pulling the Vase Out of the Mold
Pulling the mold off the vase is a vigorous activity. Sometime I use a chisel to chip of the seams so the mold will release. It is very exciting to finally see what the sculpture looks like.
Disappointment
I am disappointed when I see the whole thing. There are passages I like but the shapes are confused by the color. They fight with each other making the vase hard to see.
Its ugliness is plain old ugliness rather than the compelling, intense, passionate ugliness I have envisioned.
I tell myself not think about it. There is much more work to be done before the vase is finished. Possibly the work will “solve” the vase’s problem. But I wish, just for once, that a project would succeed right off the bat without struggle and disappointment. That is not the way of sculpture. Alas.
February 12 – 25, 2009
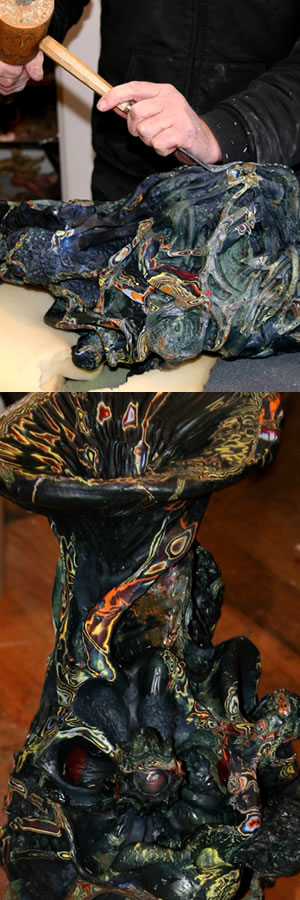
Fixing the Seams, Carving Away the Surface.
Carve away the seams. Carve imperfections in the impression to unify shapes and lines. Fill areas with Apoxie-Sculpt to smooth seams and create more believable transitions from one shape to another. In other words, fix it up, clean it up.
Chipping away the dark blue surface to reveal the brightly colored patterns makes the piece come alive and resolve many of its “problems”. I discovered what the piece is about, its hidden nature, exposing its inner wildness.
March 6, 2009

Making a Table Top for the Vase
I make a tabletop for the “crazy” vase using the same colors as are in the vase. I know that the table should be “plain” without too much color but I can’t restrain myself. And so there is some color.
I make the tabletop (not shown here) and rasp it down and sand a little to get an idea of what the surface will be like when it is finished.
But the Table Top Doesn’t Work
I place the “crazy” vase on it but don’t like the combination. The tabletop is the wrong shape and has too much color and does not work with the sculpture. Back to the drawing board. However the tabletop, once finished, will be a nice one… for something else.
March 13, 2009

An Unexpected Decision
Occasionally I ask my wife, Alice, into the studio to get her thoughts on a work in progress. She is in the studio looking at another piece when I ask her about placing the “crazy” vase on a table. On a whim I grab the gaudiest tabletop and both of us decide, much to our surprise and against expectation that we like the two together.
You never know what will happen.
March 24, 2009
Matching and Preparing Colors for the Table Legs
I match the colors of this table top by checking my color swatches and mixing color by trial and error. I pick four colors in the table top to be repeated in the table legs.
Color Recipe for Table Stand
Bright Pink – 2000g
1800g red + 200g white
Dark Red – 400g
380g red + 20g black
Light Blue – 400g
240g blue + 160g white
Gray – 400g
320g white + 80g black
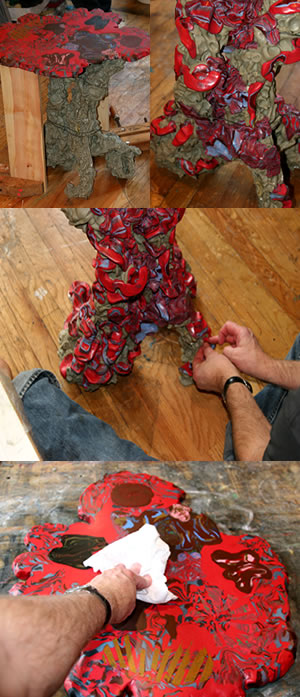
Making the Table Legs
Holding up the tabletop with 20″ 1×5’s, I wire together some sculpture “leftovers” to make the foundation for the table legs and then secure the structure with the four Apoxie-Sculpt colors.
Slowly, the table legs are covered with Bright Pink, Dark Red, Light Blue and Gray.
The height is adjusted so the tabletop is level and extensions are added to stabilize the table.
Gaps are filled in the tabletop with matching colors, then rasped down to be flat and true.
The tabletop is sanded with progressively fine sandpaper (60 grit, 120 grit, 150 grit, 240 grit and 600 grit), rubbed with 000 steelwool and oiled with mineral oil.
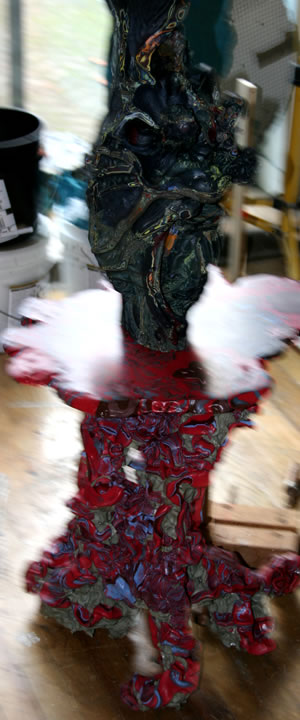
Looking at the Crazy Vase in its Most Recent State
Spend a moment to look at the vase on its table and ponder on it.
It is almost finished but I must wait for money to buy time and materials before I can continue.
Thank you so much for your generosity.
It’s been a long time since artists interacted in this kind of way….I’m a sculptor and was given some Apoxie some years ago; I stopped using it and have been going crazy trying to remember the name.
I’ve bought half a dozen things a I hoped were it but weren’t ( fireless clay, fimo etc..)
I’ve loved your work since I first saw it in LA 20 years or so ago. I’m a contributing editor at Sculpture Magazine. I am currently writting a focus article on Kathy Butterly so it was an interesting coincidence to see her on your site.
Please go to the Sculp-mag site to see some of my writing. I am especially interested in process and craft based work; I write exclusively about artists with that emphasis. My next upcoming feature is on Gregory Barsamian, he’s also in Brooklyn.
Kay